The L is silent.

Tales from The Beard, famed piper of the Dimrill Dale (A LOTRO Blog)

Viewer Discretion is Discouraged.

Latest

On Grace & Virtue, A Man On A Wire

Bulging Doris wrote in that shamrag article of his that I run a tame BB!  Can you imagine?  What gall, what insult!  I am wounded by the quill! To think he wrestled the authorship of such articles from the Celebrity Reporter himself so that he could be a more upstanding modicum of grace and virtue for the LMB as a field reporter!  Oh, oh, oh how easily they fall! Even worse, some Pontius character suggested this week that PB should try taming me into some infallible type of paladin character.  Oh dear.  My debau Ch’i ry level is unbalanced!  I can take Aegthil being credited to everything from the sun rising in the East to the strength of the tides, but to say that he and Carica constitute the prime offenders in BBB band debauchery level is really too much for this humble muse.  Detractors, beware!

Step 1.  Cut a circle in the box.

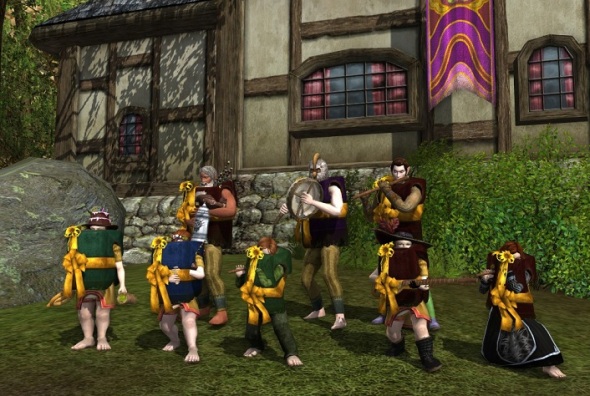
The Birgin Brigade.  Black Boots Boptional.

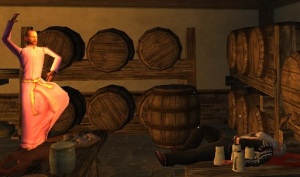
Despite Turbine force-emoting bandmates with sound bugs and disconnections, BB’s modus of operandi this week was extra degenerate (ED) per usual until our finale feature, a new transcription (they’re all here if you’re interested) for bone-broken boozemaven Carica called “The Stripper”, complete with pighorn.  And in proper form, the boxes came off (shall I spare your eyes?)  Pity poor Lauralda, our newest degenerate, for what she had to endure at her first BB.  Merry Yulefestimas, Bree!

Karma is utter bupkis.  Loyalty gets you nowhere.  Honor is for the birds.  Do what you want.

Glug, glug, glug,

~P.B., Over-Stressed, Trapped, Depressive Holiday Neurotic, Most Degenerate


Image

Oh The Drama!

Virgin

In Which There Is An Unexpected Ridiculous Beard Competition

“There are no safe paths in this part of the world. Remember you are over the Edge of the Wild now, and in for all sorts of fun wherever you go.” ― J.R.R. Tolkien, The Hobbit

In honor of No-Shave November and The Hobbit soon-to-be-released, I have decided to give away some hard-earned gold in a very undwarfish manner!

Just visit (http://apps.warnerbros.com/thehobbit/ar/uk/) and dwarfify yourself in the most ridiculous manner possible and post it to (http://tinyurl.com/ilikebigbeardsandicannotlie)!

On the day of The Hobbit release (December 14th), some degenerate BBB members and myself will pick some winners and give you gold and whatever other silly prizes I may find!  It’s that simple!  (If you’d like to donate gold toward prizes or anything else, please contact me in game.  Prizes will be updated as the close draws near.  Basically, the more entries there are, the more gold I would like to give away!)

Don’t want to actually show your face?  Okay!  Substitute a dog or a watermelon, I don’t care! Have crazy sunglasses? Okay!  Want to do something with some fancy outer-world software?  Sure! There are really no rules! If you have a crazy image that you’re just not sure is forum-friendly, you can send me a link via PM on the forums.

All entries will be considered and probably mocked!  Have fun, have laughs!  Baruk Khazad!
(Note: Entries from outside Landroval are also welcome – I just won’t be able to give you gold if you’re hilarious.)

Thoughts for Black Friday Shoppers, Stolen, By PB

The wretched features of ennuyés, the white features of corpses,

the livid faces of drunkards, the sick-gray faces of onanists,

The gash’d bodies of battle-fields, the insane in their strong-door’d rooms,

the sacred idiots, the new-born emerging from gates,

and the dying emerging from gates,

The night pervades and infolds them.

– From The Sleepers by Walt Whitman

And in case that’s just too intellectual or something, just watch this to get the gist of the thing.

In Which PB Can’t Help But Play in Paint

A ROSE LOBSTER!

I really tried to resist. Truly, I did.

Inspired by Aegthil’s latest musing @ I fancy myself a lobster.  Gaze upon it while enjoying this gem of modern entertainment.  I promise it will up the disturbafication factor by 10 or maybe -2 or something.  And… if you really have no clue what this may be about, allow me to point you here.

Sarumadness!

I gathered this information from my own experience and a number of sources listed at the end in the hopes of making a concise guide to help those unfamiliar with the raid run successful PUG groups. If you find something I have left out or would like to see me include, please leave a comment. ~ B.B.

Pinnacle of Orthanc

Aka Sarumadness!

Notes

  • ·         Before beginning, each raid member should have a generous amount of healing/power potions and max-level wound/disease/poison/fear draughts.  Short/long-term food is also highly recommended along with hope tokens and battle/warding scrolls.  Don’t be that person who has to beg food or pots off someone because you haven’t prepared.
  • ·         No one should retreat from the fight (per usual for boss fights) as you will be locked out for the duration.
  • ·         Ring bearers (described more in-depth below) must be alive at the end of each round.  If a ring bearer goes link dead and cannot return before the end of the round, wipe and restart since the raid cannot advance into the next phase.  If a ring bearer does go link dead, you can prolong the round by not killing the last Saruman clone until the person returns.  This becomes more taxing the further the group advances.
  • ·         A useful setting is to ‘show dispellable effects only.’ This becomes vital in phase three so that members can see and call out who needs to use a draught.

Party Make-up

  • ·         2    Tanks – keep agro on clones off of dps/healers (GRD, WDN.)
  • ·         1-2 Captains – buffs, off-heals, rezzes.
  • ·         1-3 Lore-Masters – de-buffs on Saruman/s, power, off-heals, tactical mitigation.
  • ·         2-3 Healers – heals, rezzes (MINI, RK.)
  • ·         ?    Dps – dps. (Pew-pew, shing-shing…)

The Fight

The battle occurs in five phases, six if you count the last bit with Saruman himself.  Each stage is triggered by five ring bearers countering Saruman at the appropriate positions (color-coded.)  Each ring has different abilities (described below) that aid in the combat.  After the rings are assigned and all are claimed, the battle begins after Saruman monologues a bit.  Each phase (keep reading) happens slightly different, so different tactics must be used.  Once the last Saruman clone is downed each time, the ring bearers should be in place to claim their rings so the next phase can be triggered.  In T1, the rings may be triggered in any order.  However, in T2, they must be done in the order Saruman shows with his staff, or the phase will not advance.  You will have to repeat the latest phase over.  For challenge mode in T2, no one can die. After phase five, the raid briefly fights Saruman before completion.

Also:

  • ·         The dps team should stay tightly bunched to assist healers through the battle.
  • ·         (Kill order may vary from group to group, but the one listed is one I’ve seen used successfully.  Mechanics on each Saruman are better described in the first resource listed below if you are interested.)
  • ·         The area around the center Saruman results in a ‘silence’ effect, so tread around the outside of the ring if that affects your class skills.
  • ·         Tanks split clones with dps group following the kill order listed.  Lightning should be tanked away from the dps group whenever it’s not being taken out.
  • ·         Dps-side tank should keep the clone turned away from the group but within melee range when possible.
  • ·         Saruman clones can be crowd-controlled, but adapt after one mez. This ability be extended using the frost ring.

The Rings

  • ·         Spare tanks and primary healers the responsibilities of the rings.  They will have enough on their plates.
  • ·         Tactical mastery classes are best suited for most of them. (LM, RK, CAP, MINI.)
  • ·         All de-buffs and buffs become available again each round.
  • ·         Ring bearers need to know their positions and how to trigger additional phases.

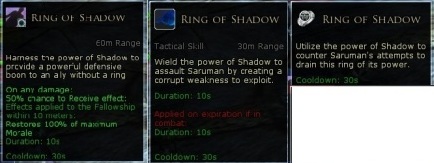
Shadow

·         Shadow corruption goes on shadow clone first.  No one should remove corruptions until the corruption is at T3 (20+ seconds.)  Once it is removed, it does a massive amount of damage.  All members can remove corruptions at will once this is complete in each phase.  Be sure to arrange who will remove the corruption at the right time.

  • ·         The defensive boon is good to use when the dps team is near the dps-side tank and in dire straits.
  • ·         Any class works, though a high tactical mastery will greatly increase the amount of damage done.  Even better if it is one that can remove corruptions, since that’s one less bit of coordination to fret about.


Lightning

  • ·         The defensive boon is great to give to high dps class (champ, hunter.)
  • ·         The offensive skill is a distributed nuke. 
  • ·         This ring can be wielded best by a red-line tactical mastery class (lore-master, rune-keeper.)

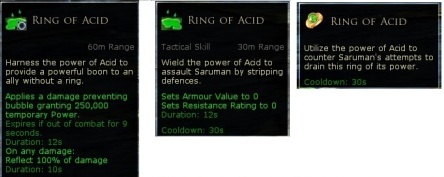
Acid

  • ·         The offensive boon is used well early on, so that either the first or second clone can be destroyed quickly.
  • ·         The defensive skill can be used whenever a player is getting low on power or is getting hit by a clone they shouldn’t be getting hit by.
  • ·         Any class works well for this one.

Frost

  • ·         The defensive skill is best placed on one of the tanks early on when they are acquiring agro.
  • ·         The adaptations can be removed if a crowd-control skill is regularly being placed on any of the clones.  It is best used later in the fight otherwise, when fighting clones that have been buffed by earlier ones.
  • ·         CC classes can use this ring well though any could if they knew what to watch for.

Fire

  • ·         Both skills are offensive in nature.
  • ·         Place the boon on someone who already causes high dps. (champ, hunter.)
  • ·         This ring can be wielded best by a red-line tactical mastery class (lore-master, rune-keeper.)

Phase I

  • ·         Kill-order:  Shadow, Venom, Storm, Frost, Fire
  • ·         Battle begins once Shadow ring is claimed.
  • ·         Ring bearers return to their spots before the last clone has 20k morale.
  • ·         The fight can be prolonged to allow for skill cool-downs and power regeneration if needed.
  • ·         Eat short-term food once out of combat. Ring bearers use their first ring skill once it lights up to hold their ring aloft.  In T2, go in the order that Saruman shows with his staff.

Phase II – “Overheal Phase”

  • ·         Kill-order:  Shadow, Venom, Storm, Frost, Fire
  • ·         Environments begin.  Ignore them. They buff their corresponding color clone, but usually change too quickly for the dps-side tank to worry about. (The first resource has more on this topic for interested tanks.)
  • ·         The venom clone will randomly put massive poison DOTS on raid members. The DOT is cleared once the targeted player is healed to maximum morale.  All healing classes should assist as the healer calls out who to “overheal.”  The poison de-buff appears as a green box with a cross.
  • ·         Once the venom clone is defeated, healing is no longer such an issue.
  • ·         Ring bearers return to their spots before the last clone has 20k morale.
  • ·         The fight can be prolonged to allow for skill cool-downs and power regeneration if needed.
  • ·         Eat long term and short-term food once out of combat. Ring bearers use their first ring skill once it lights up to hold their ring aloft. Refresh captain buffs/scrolls/tokens, etc.

Phase III – “Potting Phase”

  • Kill-order: Shadow, Frost, Venom, Storm, Fire
  • The central Saruman becomes active in this phase and should immediately be de-buffed by the lore-master using improved frost lore. This and other de-buffs should now be run continuously on the central Saruman until the end of the raid as they affect all clones.  This lowers the amount of damage they are able to deal.
  • The frost clone causes pot-able effects on random players.  These must immediately be potted or else the resulting effects can quickly cause the raid to wipe.  Until the frost clone is eliminated, the most important part of the fight is quickly removing these effects before they cause massive damage/death. They must be removed within 8s.
  • Saruman will also randomly cast purple fear clouds that raid members must maneuver out of.  Moving continuously clock-wise seems to be the preferred tactic of dps groups. Always move behind clones instead of in front of them.
  • Pot-able effects end once the frost clone is defeated.
  • Ring bearers return to their spots before the last clone has 20k morale.
  • Ring bearers use their first ring skill once it lights up to hold their ring aloft.

Phase IV

  • Kill-order: Shadow, Venom, Storm, Frost, Fire
  • Pot-able effects no longer occur.
  • The group must maneuver continuously dealing with purple fear and green poison clouds. 
  • Shadow clones drop healing clouds that they should be pulled out of.
  • Venom clones drops the poison clouds and should be defeated second so he stops.
  • Ring bearers return to their spots before the last clone has 20k morale.
  • Ring bearers use their first ring skill once it lights up to hold their ring aloft.

Phase V

  • Kill-order: Shadow X 2, Venom X 2, Storm X 2, Fire X 2, Frost X 2
  • Dps group should move as a group from doorway to doorway since non-dispellable knockbacks occur through the round.  A ring bearer overboard is wipe news for your raid, so be sure to stress the importance of keeping against the doorway walls to minimize the chance this will happen.
  • A mezzing class should immediately mez the second shadow clone that is not being destroyed.  They have healing corruptions and they need to be interrupted as long as possible until both can be taken down.  If the mezzer has the frost ring, they can use its one ability to make it so the shadow clone can be mezzed a second time.
  • Ring bearers return to their spots before the last clone has 20k morale.
  • Ring bearers use their first ring skill once it lights up to hold their ring aloft.

Saruman

  • ·         The group should gather immediately against one of the doorways facing Saruman. Dps him at range until he monologues again.  A special friend gives you a lift and the raid completes. 


Good luck!


Resources:

http://darklegacy.guildlaunch.com/gwiki/index.php?page_name=Saruman&gid=205816

http://forums.lotro.com/showthread.php?438086-Guide-for-PUG-Tower-of-Orthanc

http://forums.lotro.com/showthread.php?440785-Saruman-rings

& other random comments and pictures I found

A Year of Firsts

From the desk of the Pet Biographer (Beorbrand is behind me practicing pipes) ~

Real-life and LOTRO have dealt us a series of firsts this last year, several lovely and mostly not-so.  However, many of the better bits have been relative to LOTRO and even small things call for celebration, especially when they do not seem so small from a personal perspective.

While I have traipsed across Middle Earth off and on since closed Beta, this is the longest I’ve played in one clip and with great delight at that.  It’s not that I’ve particularly grown enamored with the game.  If anything, I’ve been rather displeased with the direction the whole thing has taken since going free-to-play.  The greater infusion of riff-raff, micro-store ‘pay-to-win’ items, and the perceived shift from providing high-quality content to buggy repetitive quantity are all very discouraging developments.   I accept that this is the direction the game must take (with lumps and bumps) if it is to remain profitable, however.  Still, the only thing that keeps me hooked gaming in Tolkien’s world vs. any other is its online community, particularly those involved with LOTRO’s unique music system.  There’s nothing like it in any other online application, and I’ve had a real blast playing, composing, and sharing music with other kindred spirits across the globe.  It is a joy to test the music system limits, so to speak, and to play the role of a much-maligned travelling musician/pyrotechnics-expert redneck-want-to-be-intellectual (i.e. lore-master) while going about it.

I had left the game for ten months or so when my first kinship dissolved in an ugly split.  Other kinships I tried just did not feel like a good fit.  The radiance system had all but ruined the game itself for me (said kinship fell apart over it,) and the social aspect ended along with the original group.  Fun was lacking with few to share my victories and setbacks with and so I left.  I got caught up in work subsequently (I can be quite the workaholic) and it was only in facing an extended vacation that I resolved to give Middle Earth another chance.  The music system had always been of particular interest to me, and I decided to focus my time more on the mechanics and role-play elements it offered over ‘mad lootz’ and experiencing the latest content.  I still like those things, but I let the music demand first priority these days.  I’m glad for it.  When I returned to the game looking for a music-oriented kinship, I knew the Lonely Mountain Band was the place to be.  I must admit initial disappointment however, in discovering little action on the music forum and in finding LMB’s music presence outside of Weatherstock to be limited (mostly) to Old Winyards at A & T.  I had caught myself longing for something that didn’t seem to exist.  There is always the worry as well, in joining a new group that you will step on toes by becoming too involved/seeking creative control.

While quite young, I remember watching this old comedy about a bar where people gathered every night to talk about their daily trials and drown their sorrows in beer.  It wasn’t the first show I watched that featured camaraderie or drinking in large quantities, but it stuck with me.  The notion of having a circle of friends to gather with and share your drinks and tribulations was something I found very appealing. I was lucky to have such a circle of friends to pal around with until recently but the winds of life have dragged us all in different directions and mostly far away.  That notion of the community pub seems lost for many, as modern society leads many of us to live more of our social lives online.  There are social networking ‘apps’ and ‘Skyping’ and texting to keep in touch with your buddies of course, but something still seems amiss without that age-old tavern scene.  There is no opportunity to meet new people, to comment on random events or the cute blonde at the end of the row, or to take simple delight in the house band cutting loose or yelling en masse at the piss-poor referee on the television.  That fun interaction has been lost in the fray, and I’m tired of making up new cute comments for pictures of friends’ babies and adorable pet costumes while my own life stagnates in limbo.  Some long for the days of wine and roses, but I was itching for the equivalent of wings and beer, with a side of raunchy humor.

Fast forward through a good deal of forum posting and playing solo (then duo, and trio) sets at the Pony, and the seeds for BBB were planted. How fortunate for me that someone (and others later) took the bait and that it has grown into an enjoyable thing where I’ve met some superb people from all over the damn place and learned some fun stuff about a bunch of new things.

Huzzah.

I really never imagined BBB ever turning into what it has, and that’s great.  It evolves a little bit each time someone new comes through or passes on.  Irving Berlin wrote it about love, but it’s comforting to know despite everything I’ve weathered, I’ve got BBB to keep me warm.

~SO YOU WANT TO KILL A DRAGON~

Beorbrand’s Pet Biographer here – while the old man is sleeping, I thought I’d slip on quickly and and share the following nuggets I’ve discovered in PUG-raiding Draigoch.  The original post was for my kinmates, but I thought I’d post them here as well for all you happy-Googlers out there looking for hot tips and keen on walloping the Drake!  Good luck!

A taxidermist can prepare Draigoch's body for proper display at your home, but be forewarned, the shipping is horrendous!

ROI has brought us the beautiful raid that is against Draigoch, the dragon.  At the time I’m writing this, it is only open to level 75 players (and decently equipped ones at that.)  Here I’ll share what strategy tips I know from running the raid successfully with pick-up groups several times on 12-man tier 2 hard-mode.  I’ll plan on edits as I learn new things.  Please feel free to comment with anything you have to contribute.
*********************************************************************************************
Step 1:  Before You Go Fight to Fight the Dragon

*Read Ten-Ton Hammer’s (TTH) Strategy Guide for Draigoch @  http://www.tentonhammer.com/lotro/guides/misc/draigoch – it is very useful and spot-on.

*Complete the pre-requisite quest if you haven’t already.
-It can be picked up in Galtrev once you are level 75.  This involves going to Nar’s Peak, travelling to discover the cave, and returning to Nar’s Peak.  If you need more details, see aforementioned reference.

*Get your character geared up!
-A well-equipped level 75 character is a far cry from an ill-equipped one.  It really does make a difference in the raid, especially x 12!

-The first four pieces of the Draigoch armor (gloves, chest, legs, boots) can be obtained with 96 Superior Fourth Marks (S4Ms.)  Get these by doing 6-man Great Barrow and 12-man skirmish raids with others at level 75.  Not level 75 yet?  You can still go on runs, and the superior fourth marks will show up when you reach 75.  Great Barrow 6-mans can be run once a day for S4Ms.  The others will grant S4Ms once a week.  The reset for these raid skirmishes is 3am Thursday (Server Time.)  Your /raid locks will not show which ones you have completed for the week, so keep track if you are on the prowl for S4Ms! Another great thing about these runs is the chance that other top-tier items will drop in the loot.  Get out those lucky dice!  Once you have got your S4Ms from a fight for the day/week, you can still go and get skirmish marks and roll for items that are not bind-on-acquire, like the Worn Symbol of Celebrimor (to make lvl-75 Second-Age weapons.)

-Get some bling and maybe a nice cape or off-hand weapon (if you use one!)  That old level 60 jewellry just isn’t going to give you the stats you need to survive the inferno.  we have growing ranks of Westfold Master crafters who can assist you if you can help provide materials.  Update as much gear as you can to lift your statistics.  What statistics are important vary from class to class, of course.  To find out what gear you should be aiming for, I suggest inspecting other level 75 characters around new areas, consulting the LOTRO forums, and asking in kinchat/advice for guidance.  Tanks need tons of morale, etc. while squishy people need respectable will/vitality/tactical offense so that you can be the best at your class’ role in the fight.

-If you don’t already, get some morale/power potions, appropriate food (long-term & short-term,) battle/warding scrolls, etc.

*Check your virtues and traits!
-You will want to have your virtues as high as possible, certainly above 10 (if not 12!) across the board.  Physical mitigation, tactical mitigation, and high-morale are very useful in the raid, so many characters I see are running with innocence and zeal among others.  Once again, the important onces vary from class to class, so consult others who go slash-slash, pew-pew, or zap-zap like you do. This also applies for valued class traits.  Having over 6k in morale is encouraged so that you are less likely to DIE.

**********************************************************************************************

Step 2:  The IQ Test

*The ‘IQ Test’ is the nickname for the journey each character must make from the top of Draigoch’s Lair down to where he is fought.  TTH’s guide covers this well, so I won’t.  If you want to practice, open the instance and go visit the Dragon.  It takes many several tries, especially if they have lag.  Turning graphics down is highly-suggested if you have lag problems.

*Don’t touch the gold!  If he’s set it afire, it will kill you when you touch it.

**********************************************************************************************

Step 3:  General Tips for the Fight (See the TTH guide mentioned above for the fight mechanics)


*Draigoch deals very high amounts of distributed damage.  Because of this, it is vitally important that the ‘DPS Team’ literally stand on top of one another as they fight the claws.  Groups can wipe very quickly if the party does not absorb the damage as a whole.

*Within the ‘DPS Team,’ 6 members make up the ‘FM group’ which executes the fellowship maneuvers (FM) everytime Draigoch’s body falls to the ground.  These FMs are vitally important because they do a great deal of damage and debuff the dragon’s body.  They are the most important thing to get done when the opportunity arises.  This is why having 1-2 burglars is absolutely necessary for the raid.  It is important that everyone knows their position in the FM and can do them quickly.  I like to write my spots down on a paper and cross them off as we go.  Expect to get 1-2 off each round, and three if you are really, really lucky/good.  The fight can last from 45 minutes to three hours depending on how long it takes to drop the body’s morale, so executing the FMs in a timely manner is in everyone’s best interest.  For this reason, any attacks that cause a stun should not be used when the body drops, because it causes him to be immune to conjuctions for so much time.  If you are going to use any stun attacks, do it right as a conjunction is executed since 20 seconds will elapse before a new one can be triggered.  The body drops for 80s total each time it comes down.

*Don’t stand in fire!  Duh.  Sounds simple I know, but watch it happen!  This is especially important in ‘phase 3’ when fire affecting a single person can cause the whole raid to wipe.

*After the dragon flies up from being whammed on, everyone needs to follow the ‘DPS Team’ leader due West back into the surrounding caves.  There will be a brief moment after being thrown up in the air three times that you can eat if needed.

*The ‘DPS Team’ leader and the ‘Tank Party’ must communicate well and quickly to indicate which direction to go.

*Draigoch isn’t resistant to anything in particular as he’s highly resistant to everything.  He in considered Ancient Evil. He won’t deal wounds, poison, etc. so no need to worry about curative salves/pots.
*Party make-up:  Takes longer, but I think having 3 healers is ideal.  1-2 burgs is important as well as a high-morale tank. I’ve seen guardians with 12.5 – 19 k serve well as the main tank.  Lore-master warding lore causes +%10 melee damage on the claws as well as the body, so I would recommend having one of those as well because the debuffing really helps, not to mention side-heals and spare rezzing.  Captain buffs are highly valued for the fight as well.

************************************************************************************************

Epilogue: Loot If You Win – Fingers Crossed Now


*There is no five-minute timer on giving out loot like there is for skirmish raids.  Good thing too, because it’s like Christmas when Draigoch dies with all the loot there is to distribute.

*No one should touch the chests before the master looter.

*On master-looter, the party leader can assign everything that is tradeable to themself so that all the loot can appear on screen.  Proceed to link everything into raid chat followed by what you have already put in your inventory.

*It should be made clear ahead of time whether Draigoch’s Scales will be given out in groups of three or one at a time.  Most do one at a time so more peope get a ‘valuable’ item.  It takes three to make a cloak, so many may choose not to receive them unless they can get three at once.

*Items can be rolled on one at a time, or the master-looter can have one massive roll and give each person their choice.

*One of the several chests can be looted by everyone for aged relics and an experience rune.

Why You Should Never Ever Smoke Mushrooms

Self-medicating.

I’m afraid I’m still recovering from the bout I had with Beorlich’s special a while back.  The dreams I’ve been having are dreadful.  Instead of visiting warm beaches and receiving divine lotto tips in my slumber, I’ve been disturbed by visions of dorfs doing terrible things in terrible places.  That lucky pisswhistle Aegthil goes on and on about his visions of the Lovely Lady Wrenaya and here I am stuck with midgets.

It was a helluva dream, I’ll tell ya – whether you want to hear it or not.  Still reading?  Ah, well then, don’t complain when you’re scarred for life.

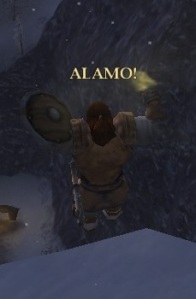
I was a DORF, just a small, tiny weak thing!  And I was running in snow surrounded by my BBB chums!  They’re slaughtering all the animals around and singing, “We’re taking the dorf to Goblin Town.”  A sense of dread and urgency was spurring me forward to the terrifying climax when dear old Bluebonnett shoved me off a cliff!  What a heartless wretch!

Alamo!

I died, of course!  Let me tell you, when you die in your dream it’s trying!  Your heart clenches up and you break out in a cold sweat!  Your eyeballs nearly bust out of your head when you are sure you have met your ultimate doom!  Your innards do all sorts of nasty-gross things as they twist with fear and regret.  It can’t end like this, you think, feeling like a failure.

As I lay incapacitated in the snow bank mourning my fate, I was surprised to see a dark demon descending over me.  Sure it was the Reaper himself, I had to hold back a giggle when he landed beside me and became incapacitated himself.  Some minion of death and resurrection!  “Just retreat,” it says, as a fountain of all knowledge.  And closing my eyes, I found myself back in Ered Luin…  What does it all mean?!!

It means that smoking mushrooms is a really, really terribly bad idea.  Take my advice kids, and stick to the pipe-weed, lest you too wake up a dorf.

Of Note to Anyone Who Doesn’t Understand Aegthil

A link of interest…